Installation of Underfloor heating
 The heating system of the "warm floor" variety is a highly effective method of heating residential premises, which has many advantages in comparison with the usual radiators. Heating elements in such a system are located evenly under the floor throughout the entire space of the room. As a result, the heat will rise from the floor to a height of up to two meters across the entire area of the room. This heating system will be an excellent choice for the first floors of cottages. It can be used to install any floor coverings, including those made of ceramics and natural stone.
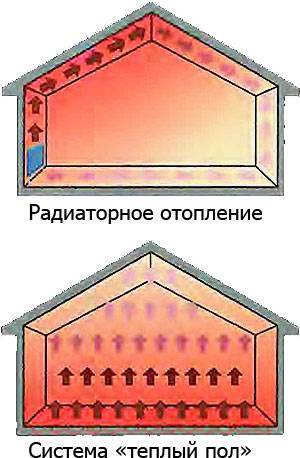 The Underfloor heating system has many advantages that distinguish it from radiators. It creates streams of hot air directed vertically from the bottom up. In the process, there is a uniform distribution of heat throughout the entire volume of the heated room. This prevents excessive heating of wall and ceiling surfaces, reduces energy consumption and establishes an optimal microclimate in the rooms. All components of the heating equipment will be completely hidden under the floor. Without a doubt, such a technical solution will make the design of the room more attractive and allow you to not limit your imagination when thinking about the interior. The use of the latest materials, coupled with reliable technologies, makes it possible not to change the Underfloor heating throughout the entire period of operation of the building.
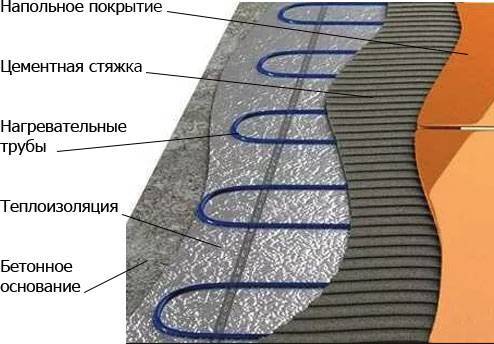 The standard "warm floor" is a structure with many layers, including a waterproofing and thermal insulation layer, reinforcing mesh, heating pipes and concrete screed. Professionally made concrete screed, placed on top of the pipes, will serve as a solid Foundation for any floor covering. The process of installing Underfloor heating may seem at first glance full of difficulties, but it can be done on your own, without attracting workers from the outside.
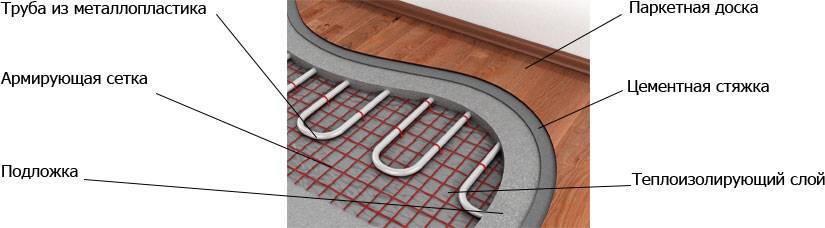
First, you need to make the necessary calculations, choose the materials, as well as the method and scheme of laying pipes. The process of installing Underfloor heating can be divided into several steps:
 - the base is prepared; - a layer of polystyrene thermal insulation is laid to prevent heat loss; - a compensating damping tape is installed around the perimeter of the room; - pipes are laid; - hydraulic tests are performed; - cement screed is filled in; - put the floor covering.
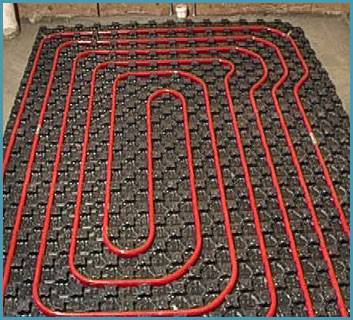
The better the thermal insulation is made, the more effective the heating will be. To do this, it will be more correct to use specialized relief mats made of expanded polystyrene. On the sides of them there are grooves designed for reliable connection of mats with each other, which makes it possible to obtain a seamless layer of thermal insulation. This coating is difficult to damage, it guarantees high-performance thermal insulation and makes it possible to fix the pipes in a certain position, without the use of additional fasteners. Thermal insulation is placed on a pre-prepared, clean and leveled base.

The role of the main heating element in this system is played by metal-plastic or polyethylene pipes. Their size is sufficient for mounting long sections without fasteners. These pipes are reliable and durable.
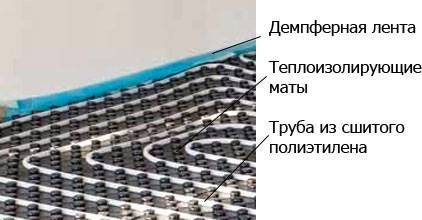 In areas where the floor meets the wall, a special damping tape is placed in the room at a height slightly exceeding the planned thickness of the cement screed. This tape can compensate for thermal expansion. In a number of situations, before installing a layer of thermal insulation, a waterproofing material is placed on the rough floor, to connect the layers of which a double-sided tape is used.
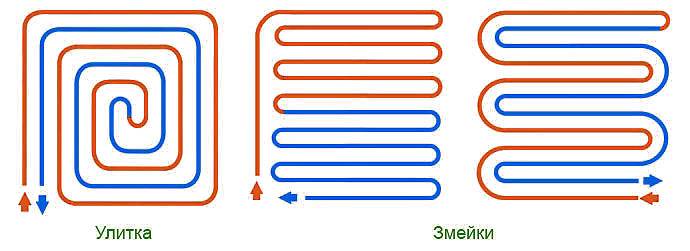
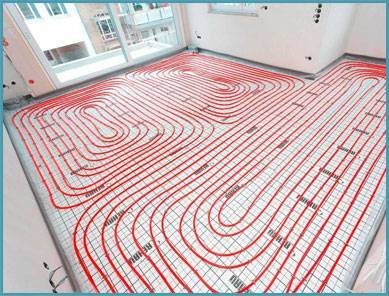
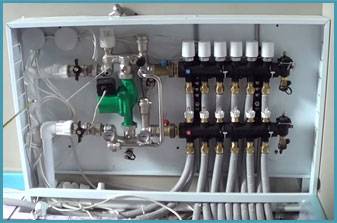 A spacious room should be divided into several sections, and then in each of them lay pipes that are not connected to each other, powered by a collector. This method makes it possible to change the level of the supplied coolant in different areas and thus change the temperature.
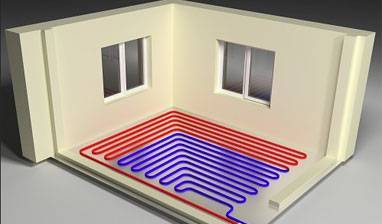 When selecting the scheme of laying pipes, it is necessary to take into account that during the passage of the heat carrier through them, they partially give heat to the floor, eventually losing their own calorific value. Therefore, the most high-temperature sections of the pipe should be placed next to the external walls of the building and Windows, because this is where there will be large heat losses.

The cement screed is poured after testing the system. During the process, the pipes must be filled with water at a pressure of at least 0.3 MPa. It is necessary to make sure that the concrete screed layer above the pipes is in the range of 3-8 cm in height.

When the screed is ready, you can put any floor covering on it – parquet Board, laminate, natural cork, ceramic tiles or carpet. These materials are aesthetic and easy to care for, and help make the interior more cozy.