

Office adress
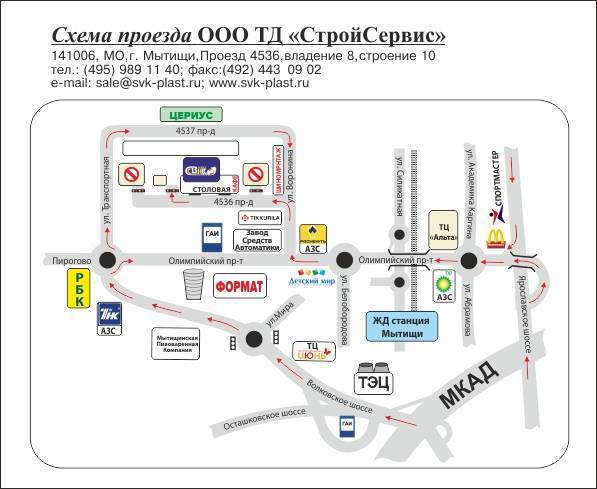
Click on the map to enlarge
Warehouse address
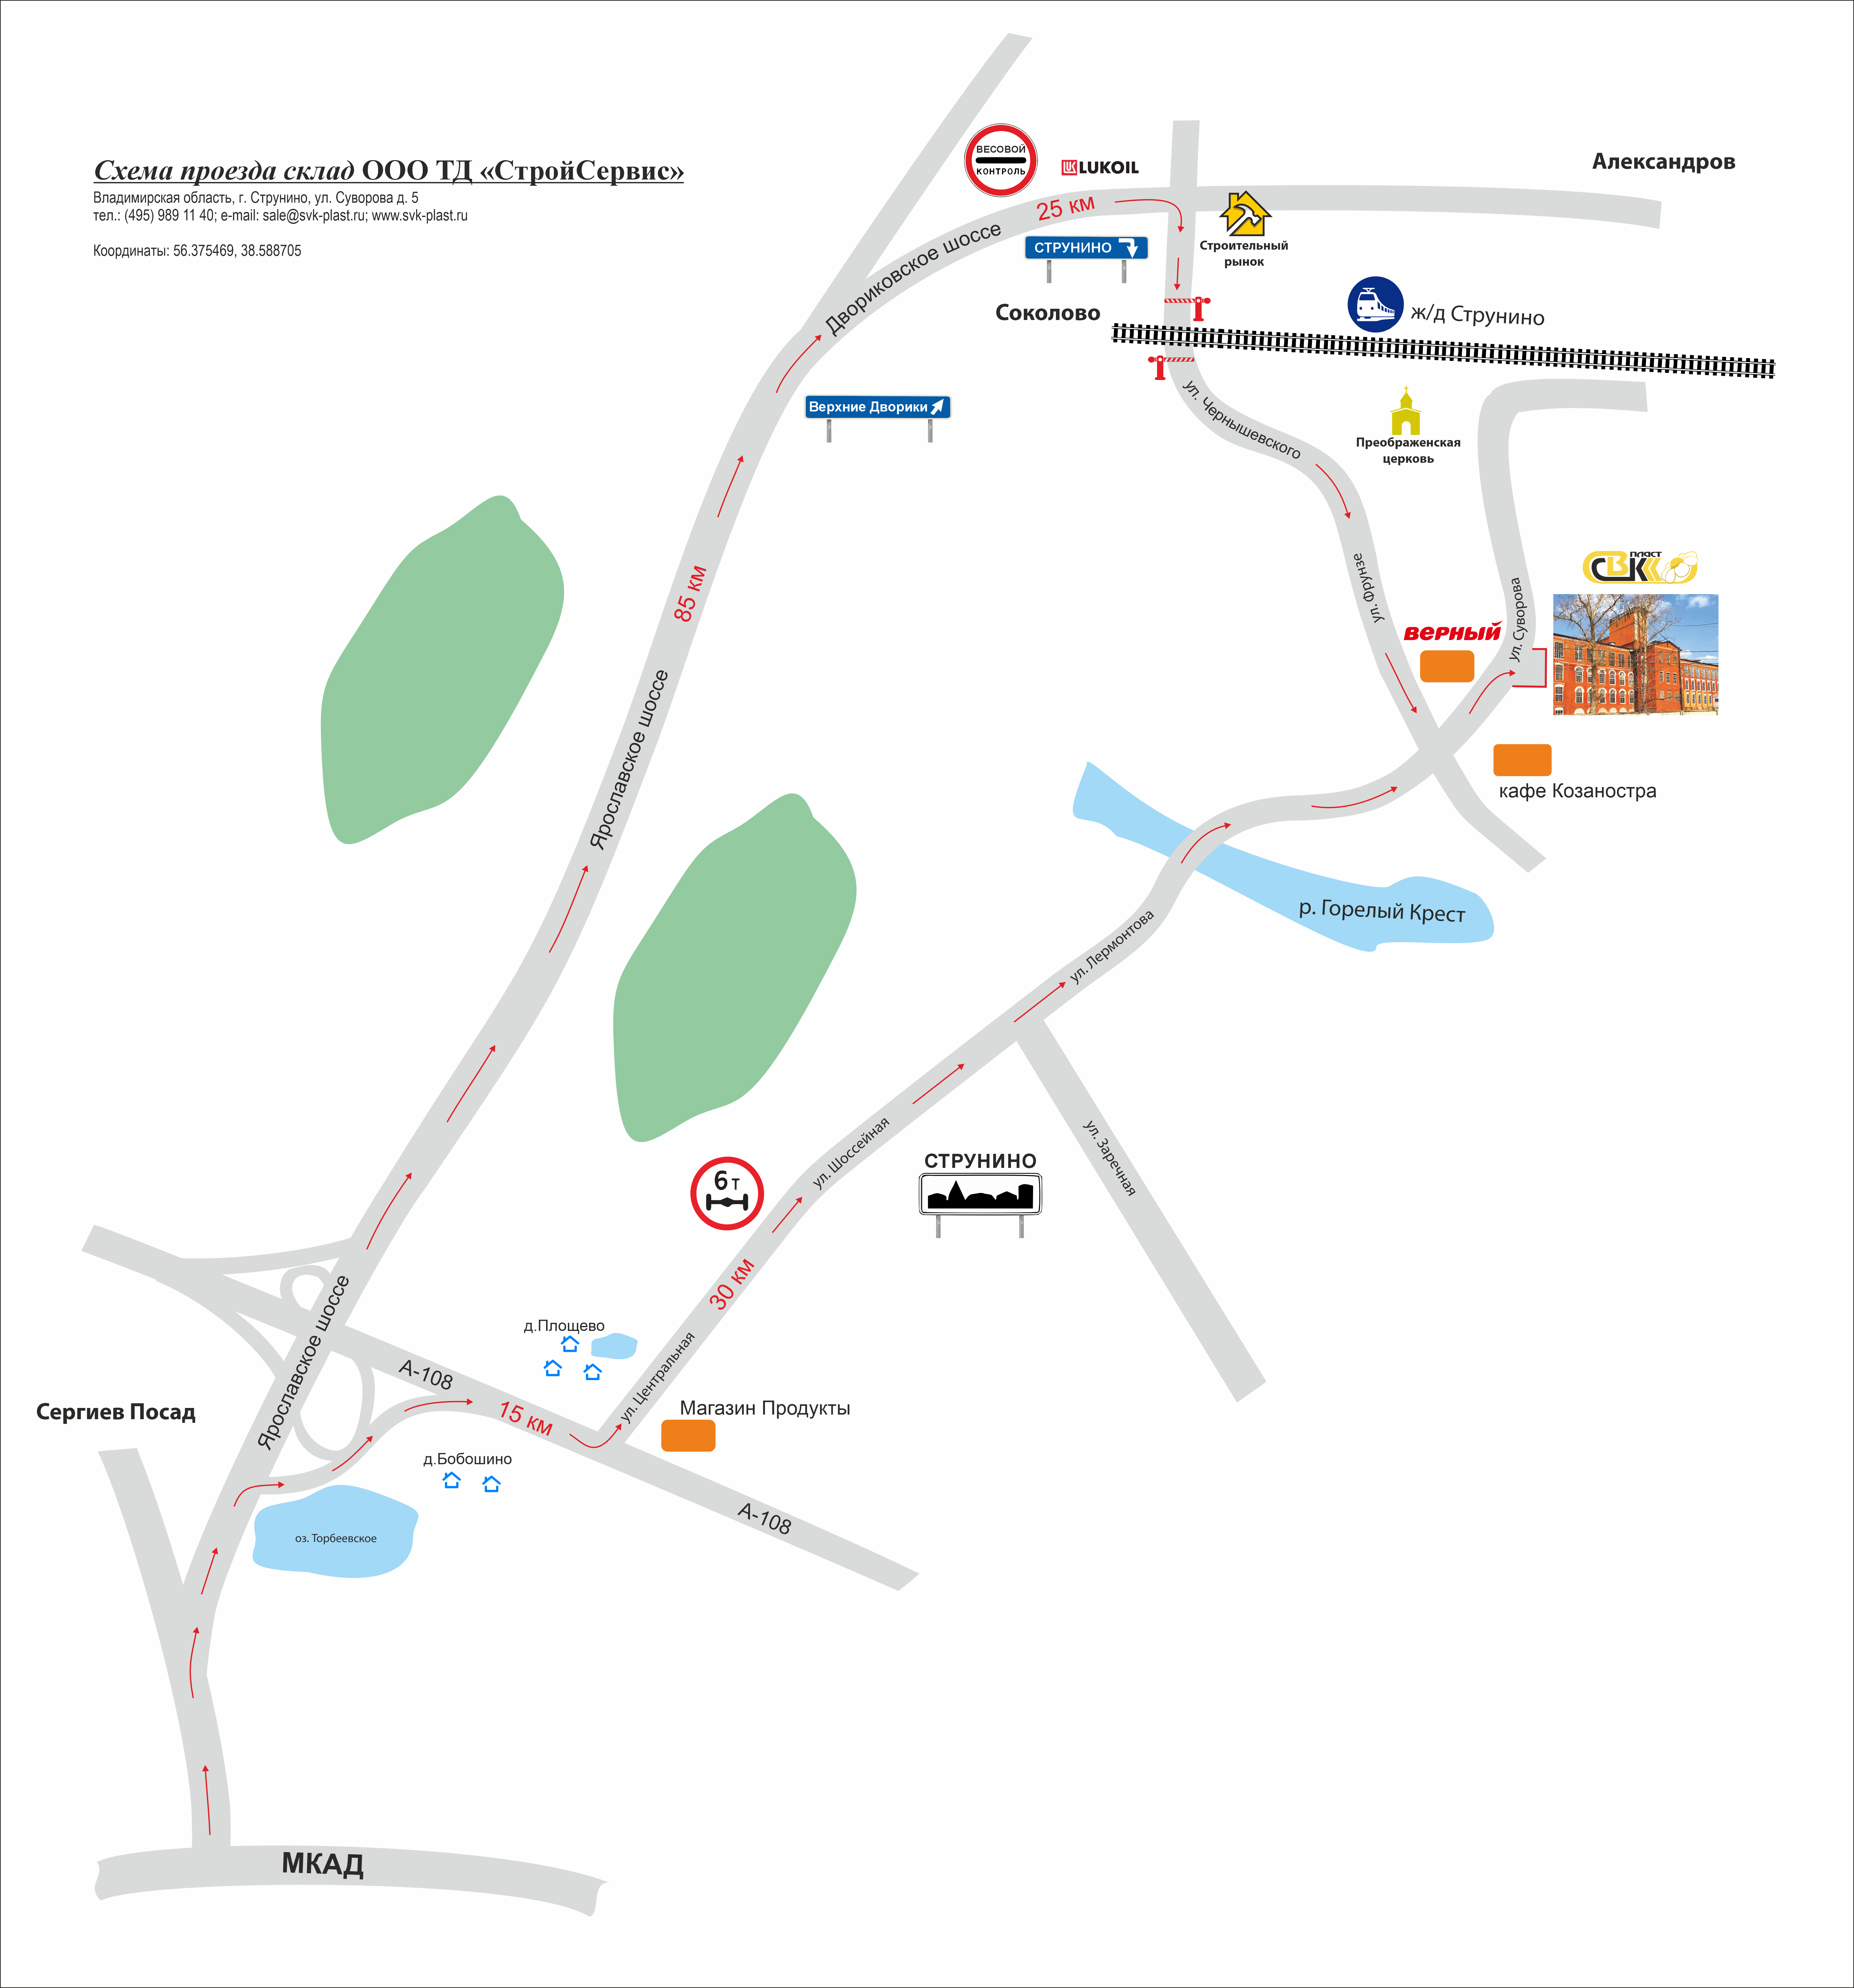
Click on the map to enlarge
ICS isolation
Water Underfloor heating system with your own hands
The presented type of floors implies the use of hot water as a source of heating. This system works on the basic principle that is placed on the surface of the flexible tube, where it circulates the water. In this case, the role of the heat source is intended for Central heating or gas boilers. The second option is most popular, due to the fact that it can be used all year round.
How the floors are arranged
This system consists of a pipeline and coolant mixing units. The first option in most cases is made of pipes made of sewn polyethylene, or metal-plastic. Among the differences between the two materials are flexibility, thermal conductivity and low resistance. Filling of pipes is made in a cement screed.
To control the temperature parameters, it is necessary to install a heat carrier mixing unit. It will consist of components such as:
- pump;
- collector;
- thermostatic mixer.
Today, especially common floors where electric heating and warm water floors are involved. In the selection process, everything depends on the consumer's desire, and we suggest that you familiarize yourself with the pros and cons of the system described earlier.
Advantages
- Installation work will be simple and will not require huge expenses.
- The components of such systems are easily combined with all types of floors, regardless of the floor covering.
- There is an Autonomous mode of use, as well as a mode with connection to Central heating.
- You can save heat. In standard rooms up to 30%, and in rooms where the ceiling height is three or more meters up to 50%.
- The presented floors can fully replace traditional heating devices, which makes it possible to maximize the use of living space.
- Work does not stop even in case of power failures, thanks to the presence of an Autonomous mode.
Minuses
- Installation of a water floor can be made exclusively in private homes, because the apartment layout does not allow using the presented system.
- Autonomous mode limits the heating adjustment, and in cases with Central heating, this option is not available at all.
- There is a possibility of a flood in cases where the diagnosis of problems and their correction were not performed in a timely manner.
Of course, the list of advantages and disadvantages presented is not complete, but the main value in the system design will be exclusively the criteria listed above. And then we will talk about how to personally implement the idea of Underfloor heating in life.
There are a couple of delicate points that we don't recommend ignoring if you want to get 100% results.
First of all, there is no need to heat the basement or room on the 1st floor(there is an increase in heat loss). In view of the above, you will need to lay thermal insulation materials under water floors.
Keep in mind that the efficiency of such an installation will directly depend on the thermal conductivity of the materials located on top of the pipeline. The higher this indicator is, the higher the effect will be.
As mentioned above, the installation will need to be carried out in a cement screed. This ensures protection from various types of damage, and increases the efficiency of the installation
Collector Cabinet: description and purpose
The collector Cabinet, which contains a variety of plugs, taps, and so on, is designed to combine pipelines and heat supply systems. The main advantage is the placement of management links in it.
To install, you will need to make a hole in the Central part of the wall. Initially, the ends of the supply and return pipes are brought into the Cabinet. The first will direct water to the floor, and the second Vice versa to the boiler. Thus, the water flow will be continuous, and this process is carried out thanks to the presence of a circulation pump.
This is followed by installing shut-off valves on each tube, and then connecting the collector. Its entrance must be connected to the valve, and the side exits are connected to the metal-plastic contours of the floor thanks to fittings. You will need to connect a regular plug or splitter with a drain tap to the output of the device. The main function of the air vent is to protect the system from air flows, and the drain tap will need to drain all the water if necessary. This method of connection must be observed on both the supply and return pipes.
In any construction store, you can buy both the Cabinet itself and the necessary parts. In addition, in most cases, the design is presented on the shelves already assembled.
Preparatory stage
Work should only start on a fully finished surface. The first step will be to clean it and align it horizontally. This will be followed by the installation of thermal insulation. To do this, you will need to lay a waterproofing film on the surface in order to avoid moisture accumulation. This is followed by pasting the walls around the perimeter with a damping tape, which compensates for the thermal expansion of the screed. It will be easy to use it, because both the appearance and design are almost similar to Scotch tape. To perform the overlap of the screed layer and thermal insulation, a width of 10-15 cm is required.
This will be followed by the preparation of the floor, namely the installation of thermal insulation. Its thickness will depend on the location of the house and the floor. If the work is carried out on the second and higher floors, then 2-3 cm is enough. And in situations where the installation of the system is planned for the first one you will need to use 20-25 cm Today, the thermal insulation market is represented by a wide variety of materials, and which one you buy will depend solely on your personal preferences.
Pipe laying
This process can be performed using two methods, namely:
- parallel, in which the pipes will be laid in the appropriate way. At the final stage, you will get a kind of "snake". This method is ideal for small and medium-sized rooms. It should be noted that the maximum temperature index in this case is concentrated at the beginning of the pipe, and, therefore, the laying process should start from the window or outer wall;
- spiral, where the laying is performed in a spiral. The result is a double helix, and the method is ideal for use in large rooms.
To make a warm water floor, you will need to buy pipes with a diameter of 20 mm or more. When buying, you should look not only at the quality, but also at the manufacturer, because the system should last a long time.
Ways to attach pipes
The reinforcement mesh is adjusted for thermal insulation, and then pipes are attached to it using wire. This method is elementary and is widely popular. But if you prefer it, you should know that you will need to leave a minimum gap at the joints so that the pipes do not deform in the future.
There is another option, in which special clips and clips are used for fastening. But in this situation, you will need an additional stage-marking for further laying of pipes.
In most cases, the installation step is 30 cm. You will need to deviate from this indicator in the area of Windows, doors, and exterior walls. These places are characterized by impressive heat loss, and therefore the indicator will need to be reduced. The recommended value is 15 cm. In addition to the above, pipe laying should be made with an indent from the wall of no more than 7 cm.
It is recommended to use pipes with a length of no more than 6 m. for one room. In situations where you need to put more, you will need to install an additional collector.
System connection process
First of all, one end of the pipe is attached to the feed manifold. After that, the installation process starts. All bends should be formed from solid pieces, so you will not encounter or significantly reduce the risk of leaks in the joint areas.
The second end is attached to the return manifold. At the end of the described procedures, you will need to start water with a high pressure indicator(1.5 times higher than the working pressure). This is how the system is tested. If everything is done correctly, then you can fill the screed.
Consumers who want to make a warm water floor can purchase a variety of mixtures with high thermal conductivity. The minimum height of the screed should be at least 3 cm, and the limit should not exceed 7 cm. Filling should be performed with the working indicator of water pressure in the pipeline. This filling instruction is located on packages with the specified mixtures.